
This guide picks up exactly where Part 1 left off. The build pipeline you stood up in the previous tutorial produces a single artifact — a TemplatePackage.dll inside a CloudDeployablePackage folder, published as a build drop. This second part takes that artifact and ships it: through a Unified Developer Environment, then UAT, then Production, with a manual approval gate before production.
By the end you will have a complete commit-to-production workflow for Finance and Operations on a unified environment. Every commit triggers a build, every build produces a deployable artifact, every artifact flows through three environments, and the path to production is gated.
If you have not yet built the upstream pipeline, start with our companion guide first: How to Build a Deployment Package for Dynamics 365 Finance & Operations. And if you have not yet provisioned a target environment, How to Set Up a Unified Development Environment (UDE) for Dynamics 365 Finance & Operations covers that end to end.
A build pipeline gets you a deployable artifact. Without a release pipeline, someone still has to download that artifact, open the Power Platform Admin Center, click through a manual deploy, remember which environment they targeted, and write it all down somewhere. Multiply that by three environments and a couple of releases a week and the cracks show fast.
A release pipeline turns deployments into a process. The same artifact deploys the same way to every environment. No more remembering which package was tested, which version is in UAT, or whether the last manual deployment actually completed successfully. The pipeline knows.
Every release leaves a record. Azure DevOps stores who clicked Create, what was approved by whom, when each stage started and finished, and what artifact version went where. When something breaks in production three weeks later, the audit trail tells you exactly what changed and when.
Approval gates separate the people who build the code from the people who authorise its release. The developer who commits the change cannot also be the person who approves it for production. This single control eliminates a category of accidental and intentional production incidents.
A serious Finance and Operations programme runs at least three environments: a development tier, a UAT tier, and a production tier. The release pipeline is what connects them. Without it, each environment becomes an island, and version drift between them becomes a constant source of bugs.
TemplatePackage.dll artifact (covered in Part 1)Where the Service Connection sits: The Power Platform service connection lives in Azure DevOps under Project Settings → Pipelines → Service connections. Create it with the Power Platform connection type, using Service Principal with client secret authentication (Service Principal supports multi-factor authentication, username/password does not). The Server URL is the Dataverse environment URL — not the F&O URL — in the form https://environment-name.crm-region.dynamics.com.
Navigate to Pipelines → Releases, and create a new pipeline using the Empty job template. The release pipeline editor opens with a single empty stage labelled Stage 1.
Click the stage card. The right-hand panel opens with editable properties. Change the Stage name field to Deploy to UDE. The label on the canvas updates immediately.
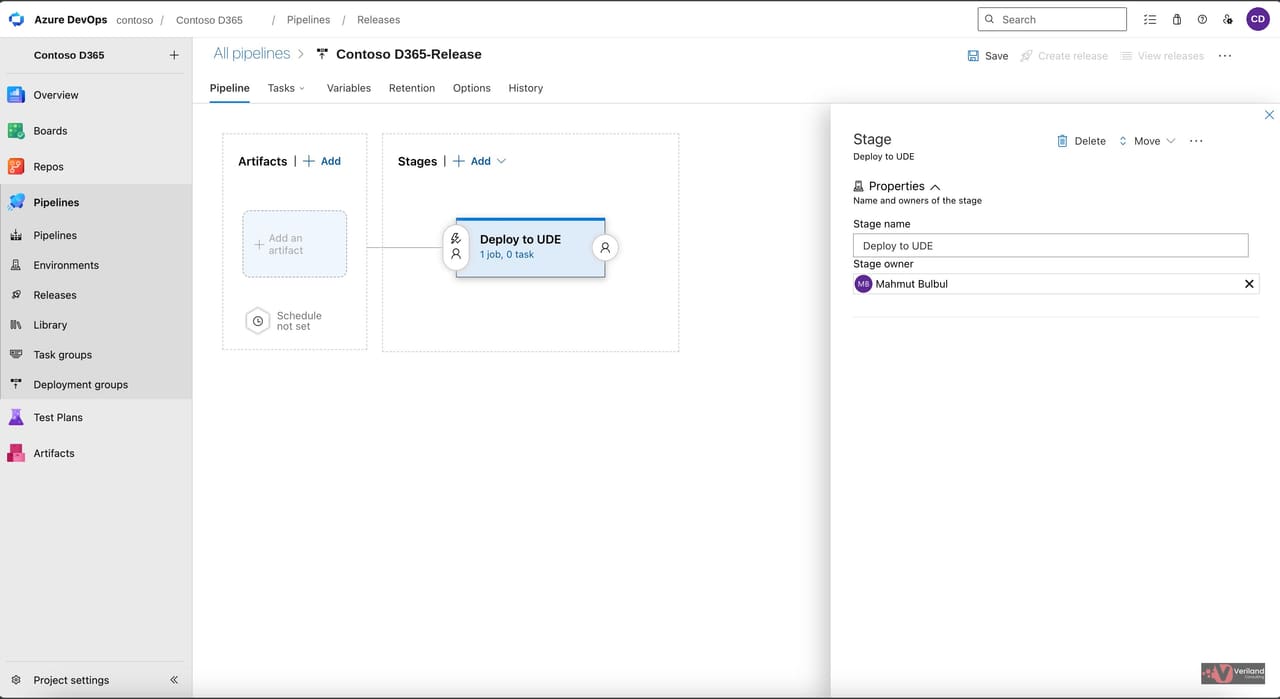 Figure 1: Stage renamed to Deploy to UDE in the release pipeline editor.
On the canvas, click Add next to Artifacts. The Add an artifact pane opens on the right.
Pick Build from the source type picker at the top. The Project field defaults to your current Azure DevOps project. In the Source (build pipeline) dropdown, select the CI build pipeline created in Part 1.
Leave Default version set to Latest, which means each release will pick up the most recent successful build. Leave the Source alias as the default value, Build.
The Source alias matters: It becomes part of the package file path in Step 8, so changing it later means updating that path too. Leave it as Build unless you have a strong reason to change it.
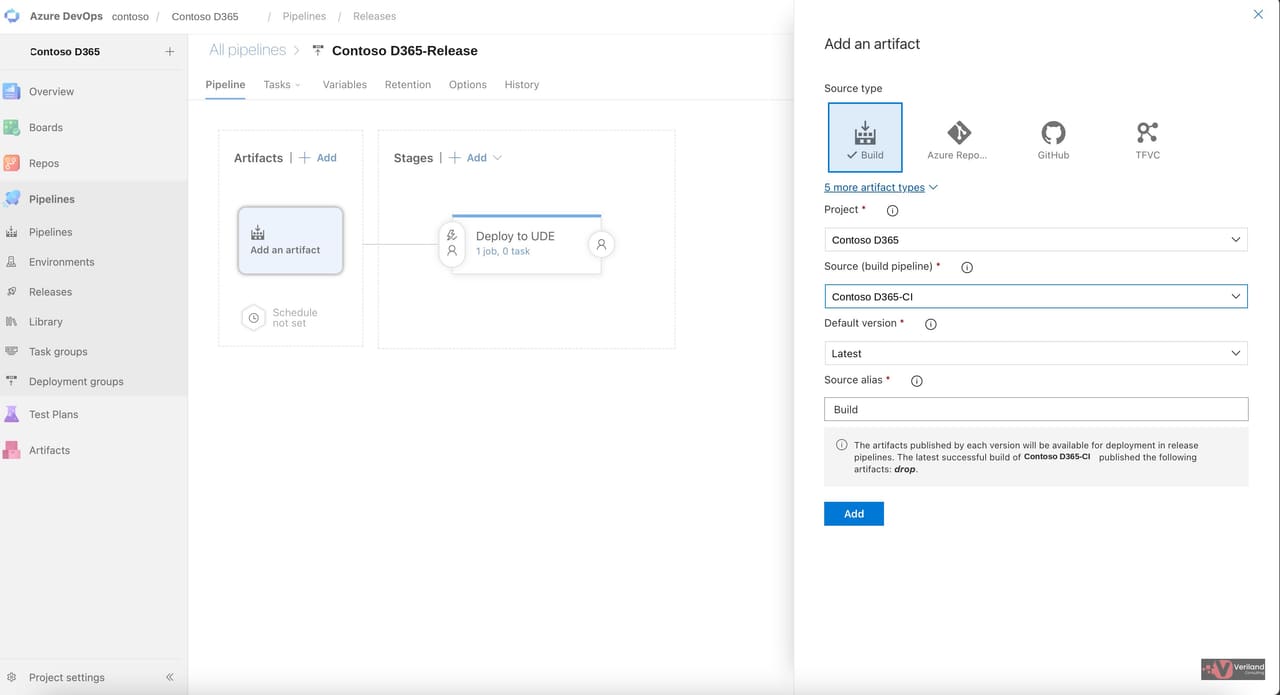 Figure 2: Add an artifact pane with the Part 1 build pipeline selected.
After clicking Add, the canvas shows the artifact linked to the stage. The build pipeline appears as the artifact source on the left, connected by a solid line to the Deploy to UDE stage on the right.
This visual tells you what to deploy and where it comes from. The release pipeline has its source defined; everything that follows is about defining what happens to that source once it reaches a stage.
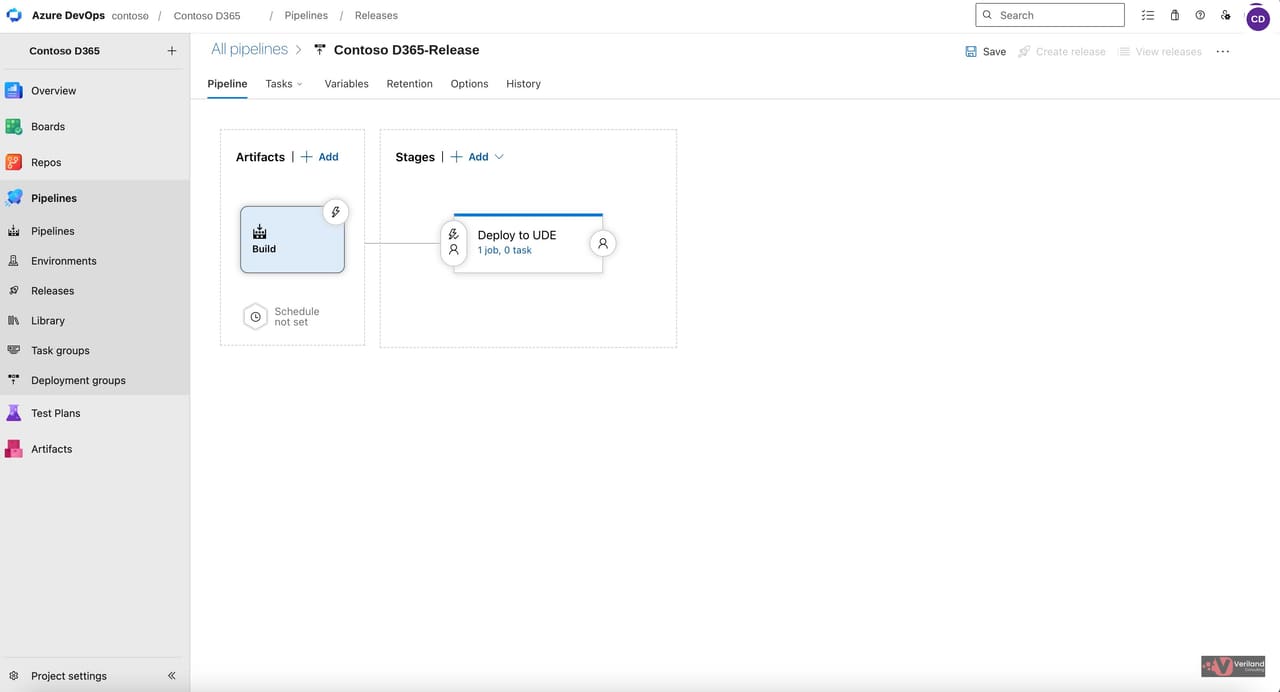 Figure 3: Artifact attached to the Deploy to UDE stage.
Click the small link on the Deploy to UDE stage that reads 1 job, 0 task. This switches the editor view from the pipeline canvas to the tasks view, where you configure what runs inside the stage.
The tasks view shows a single Agent job with no tasks attached. The plus icon next to the Agent job is where new tasks are added.
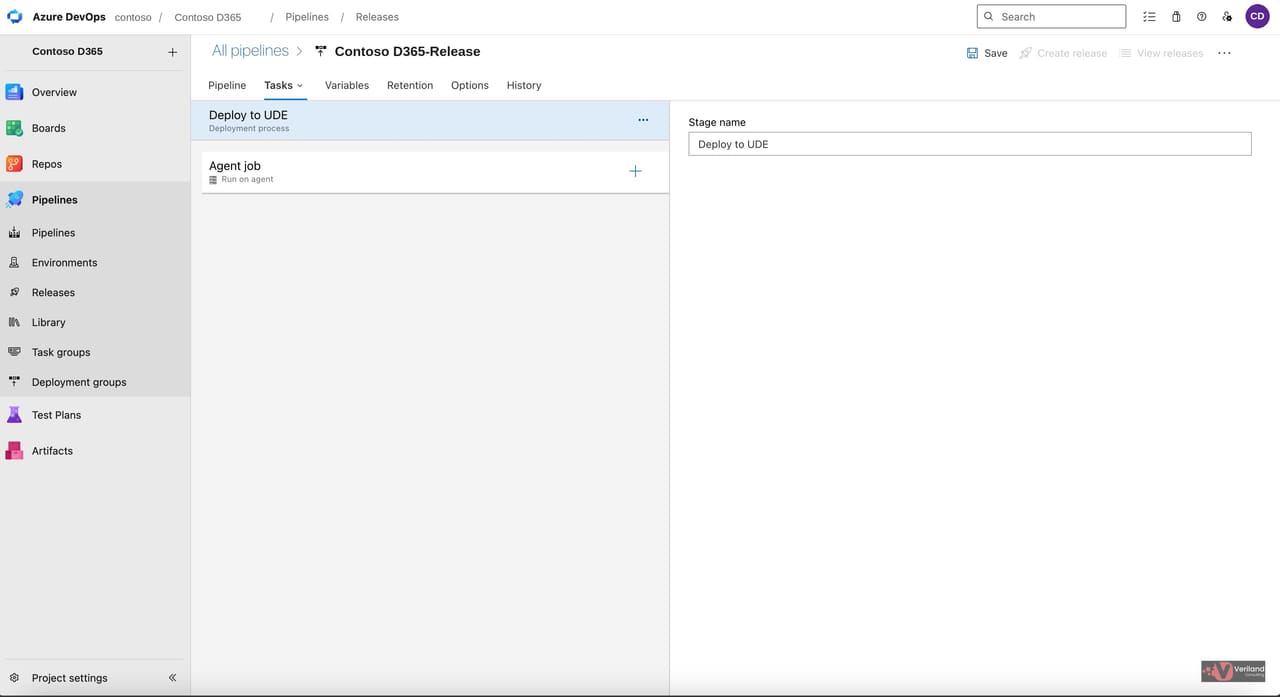 Figure 4: Empty tasks view inside the Deploy to UDE stage.
Click the plus icon on the Agent job. The Add tasks panel opens on the right with a search field at the top. Type Power Platform into the search field. The matching tasks from the Power Platform Build Tools extension appear in the results.
We need three of them, added in this order:
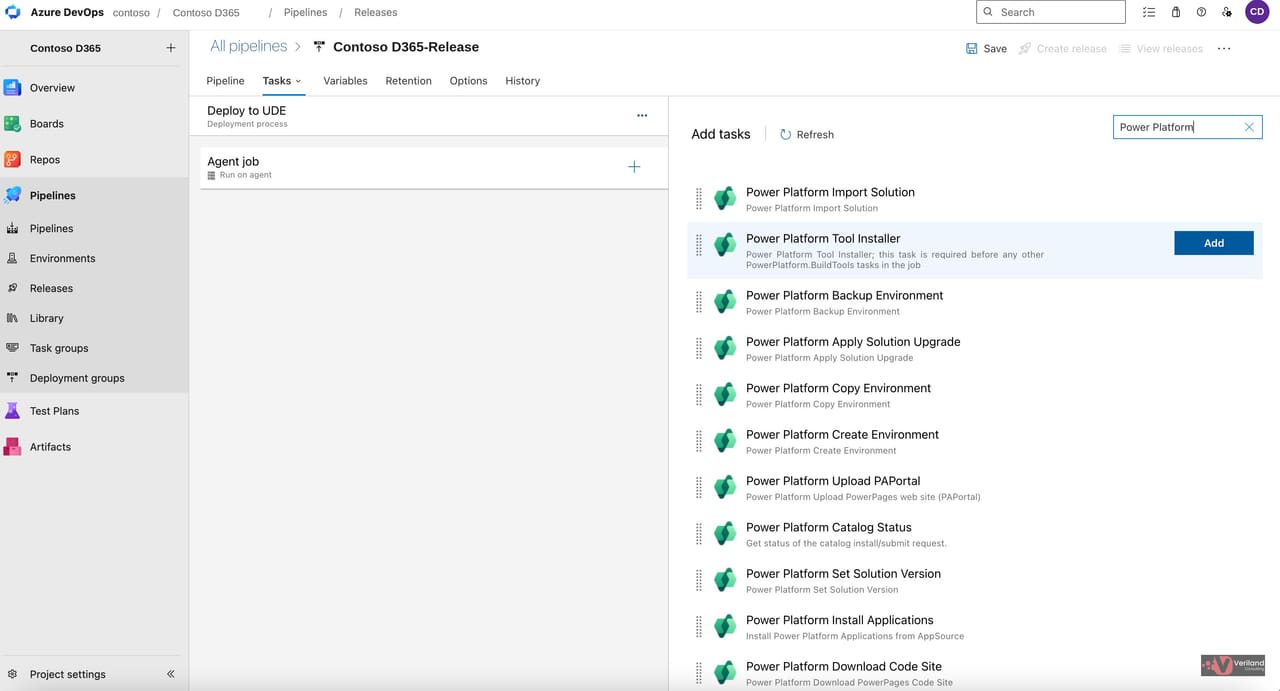 Figure 5: Power Platform tasks listed in the Add tasks panel.
Click Add on the Power Platform Tool Installer task. It appears as the first item under the Agent job.
This task installs the Power Platform Command Line Interface and other supporting tools onto the build agent so the later tasks have something to call. It needs no configuration — adding it is the configuration.
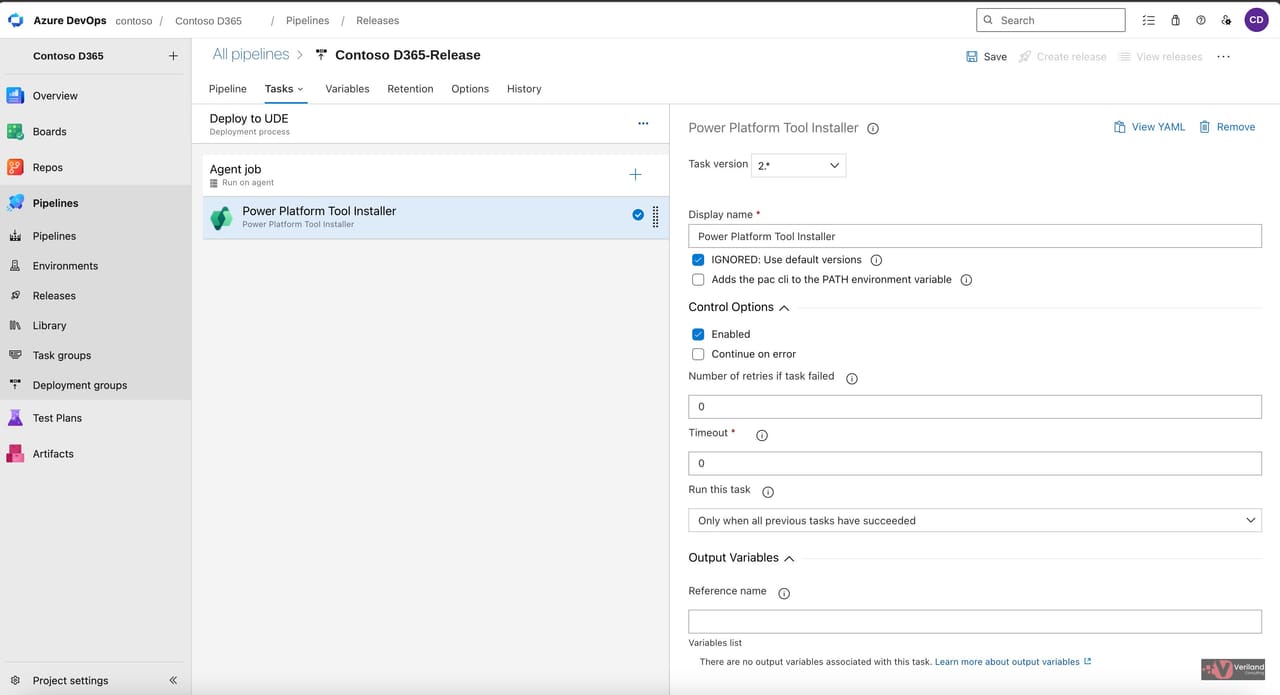 Figure 6: Tool Installer task added to the stage.
Always Tool Installer first. Without the Tool Installer at the top of the task list, every subsequent Power Platform Build Tools task fails in the first few seconds with a missing-tool error. It is the cheapest task to forget and the easiest to debug.
Click Add on the Power Platform WhoAmI task. It joins the task list below the Tool Installer.
Configure the task:
$(BuildTools.EnvironmentUrl). The variable is defined in Step 9.The WhoAmI task calls the Web API of the target environment using your service connection credentials and asks who you are. If the answer comes back, the service connection works and the deployment can proceed. If it does not, the task fails fast — five seconds, with a clear error message — and the Deploy Package task never runs.
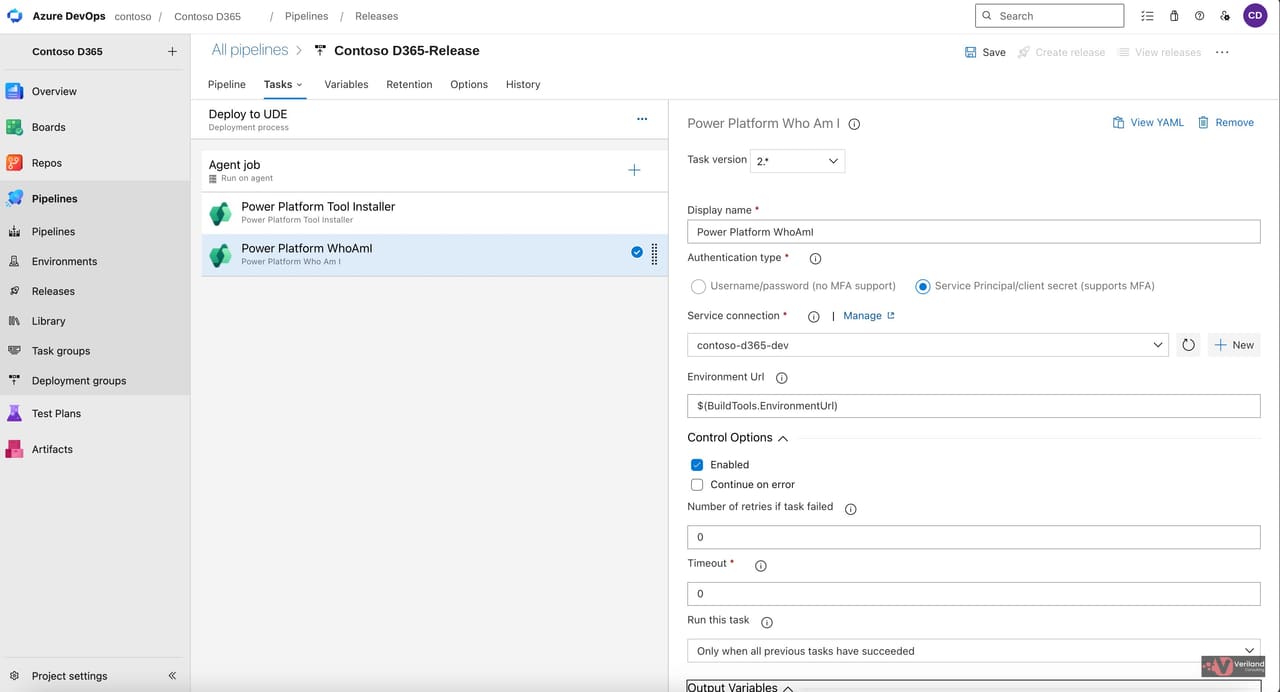 Figure 7: WhoAmI task configured with Service Principal authentication.
Catches failures early. Without WhoAmI, a broken service connection only surfaces twenty minutes into a real deployment when the Deploy Package task finally fails. WhoAmI surfaces it in five seconds. Always include it.
Click Add on the Power Platform Deploy Package task. It joins the task list below WhoAmI.
Authentication type and Service connection match the WhoAmI task: Service Principal/client secret, pointing at the same service connection. Environment URL also defaults to $(BuildTools.EnvironmentUrl) and is left on default.
The critical field is Package File, which is the on-disk path to the unified package produced by the build pipeline:
$(System.DefaultWorkingDirectory)/Build/drop/CloudDeployablePackage/TemplatePackage.dll
Reading that path left to right:
$(System.DefaultWorkingDirectory) — the Azure DevOps predefined variable for the agent's working folderBuild — the source alias set when the artifact was linked in Step 2drop — the artifact folder name published by the build pipelineCloudDeployablePackage — the folder containing the Power Platform unified package format introduced for unified environment deploymentsTemplatePackage.dll — the unified package manifestMaximum wait time is set to 60 minutes for this demo — this is the polling timeout on the Deploy Package task itself. A Finance and Operations unified package deployment typically takes over an hour, so for production work set the agent job timeout — a separate setting at the job level — to at least 180 minutes, and use a self-hosted Windows agent rather than a Microsoft-hosted one.
Leave Output log to console checked. It pipes the deployment logs into the Azure DevOps run output, which is the only practical way to debug a failed deployment.
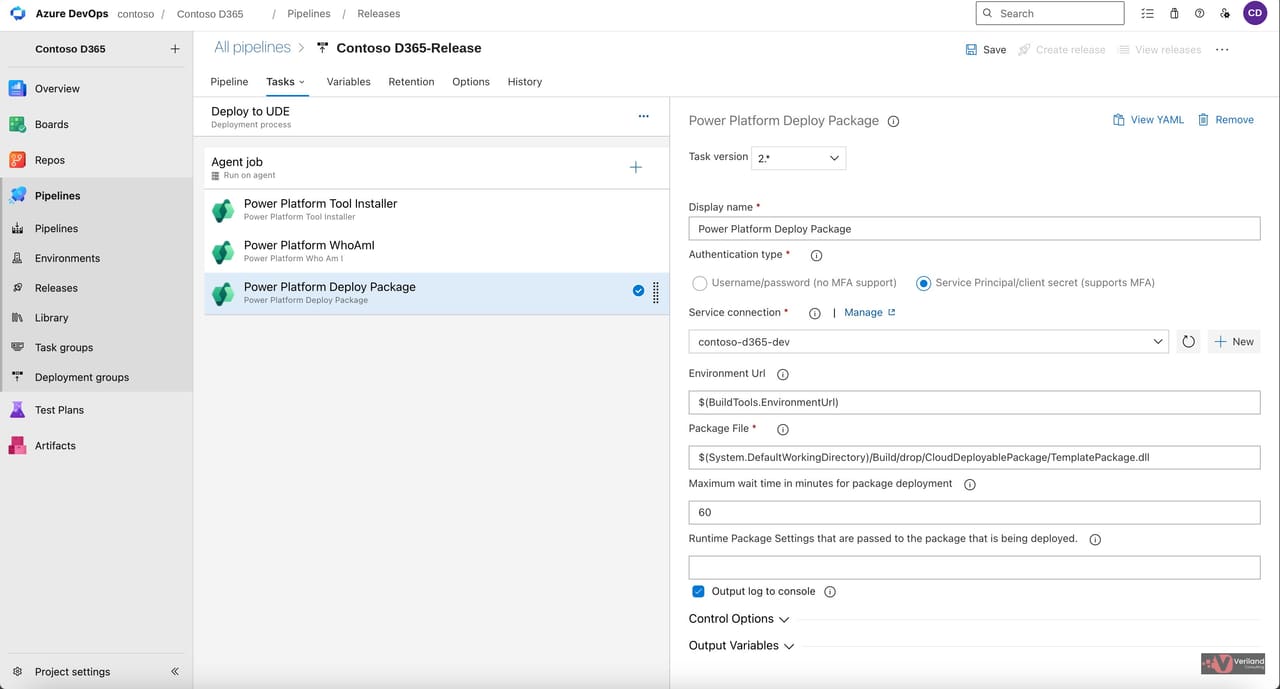 Figure 8: Deploy Package task fully configured.
If you change the Source alias: The Build segment in the Package File path comes from the artifact's Source alias. If you change the alias to anything else, this whole path needs updating to match. The same applies if your build pipeline publishes the artifact under a different name than drop.
Switch to the Variables tab at the top of the pipeline editor. Click Add and enter the variable:
BuildTools.EnvironmentUrlhttps://environment-name.crm-region.dynamics.comThe name matters. BuildTools.EnvironmentUrl is the convention every task in the Power Platform Build Tools extension expects. When set, it is automatically consumed by subsequent tasks as their default target environment. This is why we left Environment URL on its default in Steps 7 and 8 — the tasks read this variable.
Scope is set to Release, which means the value applies across every stage in the pipeline. In a real multi-environment setup, each stage would need a different environment URL, which is handled either by giving each stage its own service connection, or by overriding the variable at stage scope rather than release scope.
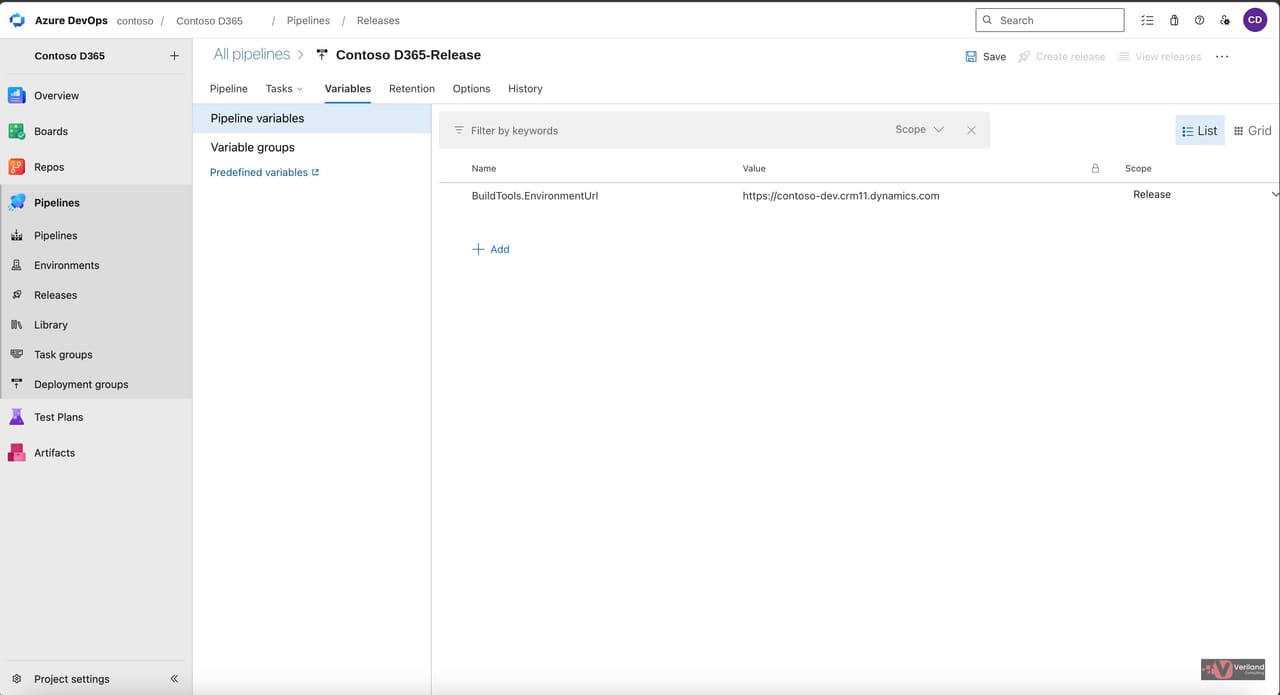 Figure 9: BuildTools.EnvironmentUrl variable defined at release scope.
Switch back to the Pipeline tab. The canvas shows a single stage, Deploy to UDE, attached to the artifact.
Hover over the Deploy to UDE stage card. A menu icon appears at the top of the card. Click it and pick Clone. A duplicate stage appears, named something like Copy of Deploy to UDE. Click the new stage and rename it to Deploy to UAT. Clone the stage again to create a third copy and rename that one to Deploy to Production.
You now have three stages, each running the same three Power Platform Build Tools tasks — Tool Installer, WhoAmI, Deploy Package. In a real multi-environment configuration, each stage would point at a different target environment by overriding the service connection or the environment URL variable at the stage level.
To add the approval gate, click the small user icon on the left edge of the Deploy to Production stage. The Pre-deployment conditions pane opens on the right.
Two flavours of approval exist for classic release pipelines:
Enable the Pre-deployment approvals toggle. In the Approvers field, add the user or group responsible for approving production deployments. Set Timeout to 30 days — if approval is not given within that window, the release is rejected automatically.
Leave Gates disabled. Gates are an automated alternative to manual approvals, where the pipeline queries an external system like Azure Monitor or a custom API to decide whether to proceed. Useful in mature pipelines, but out of scope here.
 Figure 10: Three-stage pipeline with pre-deployment approval configured for the Production stage.
Production should have at least two approvers. For this demo we use a single approver. In a real production setup, configure at least two and tick the policy that reads The user requesting a release or deployment should not approve it. That enforces segregation of duties — the person who clicked Create release cannot also be the one who clicks Approve.
Click Save at the top right and give the pipeline a meaningful name. Click Create release to kick off a deployment. The dialog shows the artifact version that will be deployed and lets you pick automatic or manual trigger.
After Create, the release summary view shows the visual flow. The Deploy to UDE stage starts immediately. Inside the stage you can watch each task execute in order: Tool Installer puts the tools on the agent, WhoAmI authenticates, Deploy Package uploads and installs the unified package.
When the UDE stage completes successfully, the UAT stage starts automatically. When UAT completes, the release pauses at the Production stage with a notification that approval is required. The approver receives an email and an in-app notification. Once approved, the Production stage runs and the package is deployed to the production environment.
Expect over an hour per stage. A typical Finance and Operations unified package deployment takes over an hour per stage. Database synchronisation or significant model changes can extend that significantly. Plan your release windows — and your agent timeouts — accordingly.
With a working three-stage release pipeline in place, you have a complete commit-to-production workflow for D365 F&O on a unified environment. A few directions to take it next:
Split the environment URL per stage — Override BuildTools.EnvironmentUrl at stage scope so UAT and Production each target a different environment. Combined with separate service connections per environment, this is the safe pattern for any real multi-environment programme.
Lock down service connections with environment-specific RBAC — Each service principal should only have the rights it needs in its target environment. The UDE service principal does not need write access to Production.
Add automated quality gates — Replace or supplement the manual approval with automated gates that query Azure Monitor, Application Insights, or a custom API. Pipelines that promote themselves based on telemetry instead of clicks scale better.
Tighten the agent strategy for Production — Self-hosted Windows agents with longer job timeouts handle long-running F&O deployments more reliably than Microsoft-hosted agents. Plan capacity around release windows.
Subscribe to the Veriland UDE Tutorial Series — This guide is Part 2 of our build-and-release series. Upcoming tutorials cover variable groups for multi-environment promotion, source-controlled YAML pipelines, and zero-downtime promotion patterns from UDE to production.
Our ex-Microsoft consultants configure end-to-end ALM pipelines, automate unified package deployments, and get your D365 F&O team shipping X++ code with confidence.
Or call us directly: 01625 569 777